1. 是什么
2. 构建
1.下载
下载url:https://github.com/goharbor/harbor/releases 我下载的版本是2.3.1
[root@localhost ~]# mkdir  /usr/local/harbor
[root@localhost ~]# ll
总计 646664
-rw-------. 1 root root      1029  5月25日 23:05 anaconda-ks.cfg
-rw-r--r--. 1 root root 662175807  6月 1日 00:00 harbor-offline-installer-v2.13.1.tgz
[root@localhost ~]# ta
tabs     tac      tail     tar      taskset
[root@localhost ~]# tar -zvxf harbor-offline-installer-v2.13.1.tgz -C /usr/local/harbor/
harbor/harbor.v2.13.1.tar.gz
harbor/prepare
harbor/LICENSE
harbor/install.sh
harbor/common.sh
harbor/harbor.yml.tmpl
[root@localhost ~]#
2.配置文件
解压成功后修改配置文件
[root@localhost harbor]# cd harbor/
[root@localhost harbor]# ll
[root@localhost harbor]# cp harbor.yml.tmpl harbor.yml #把默认模板改了
[root@localhost harbor]# vim harbor.yml #把里边的ip改了,https部分注释掉,同时查看默认密码
[root@localhost harbor]# ./install.sh #执行脚本安装
这个是yml要更改的部分 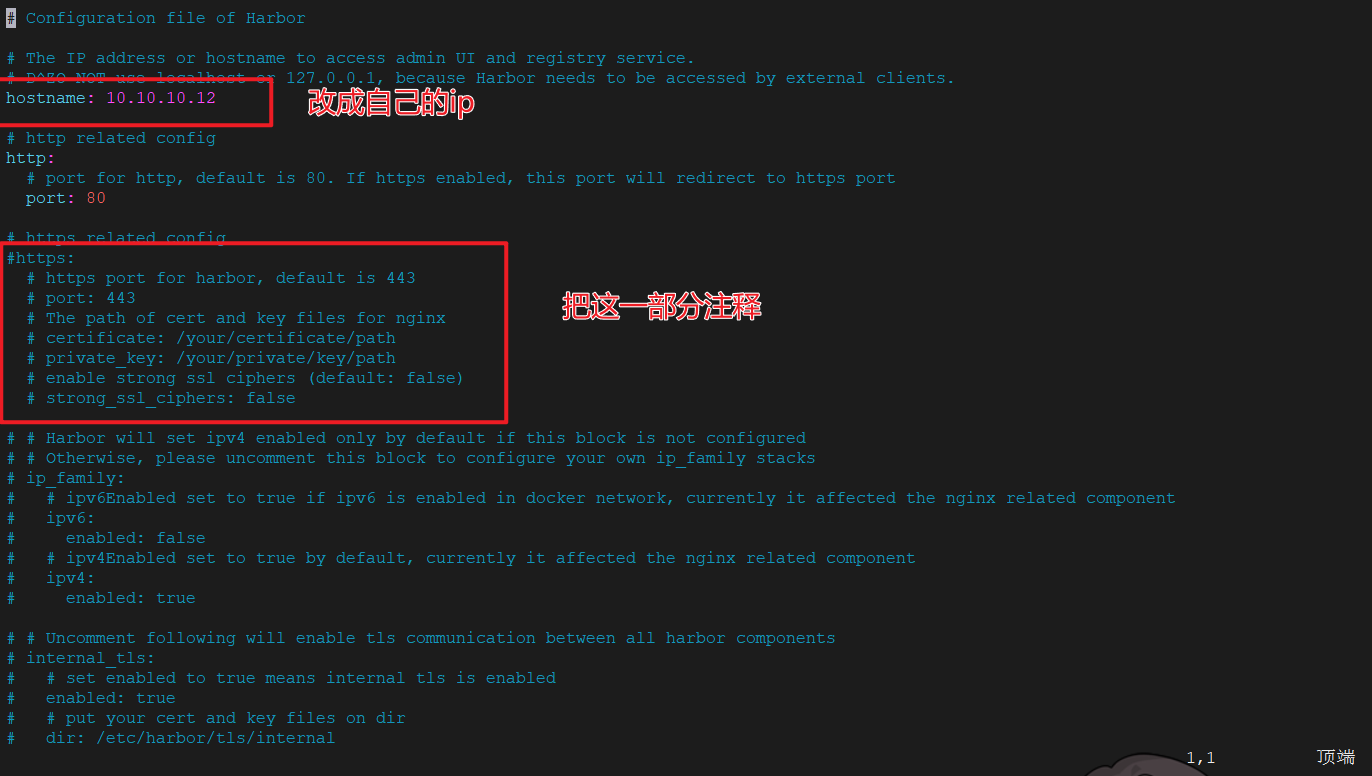 安装成功后会看到容器被启动了
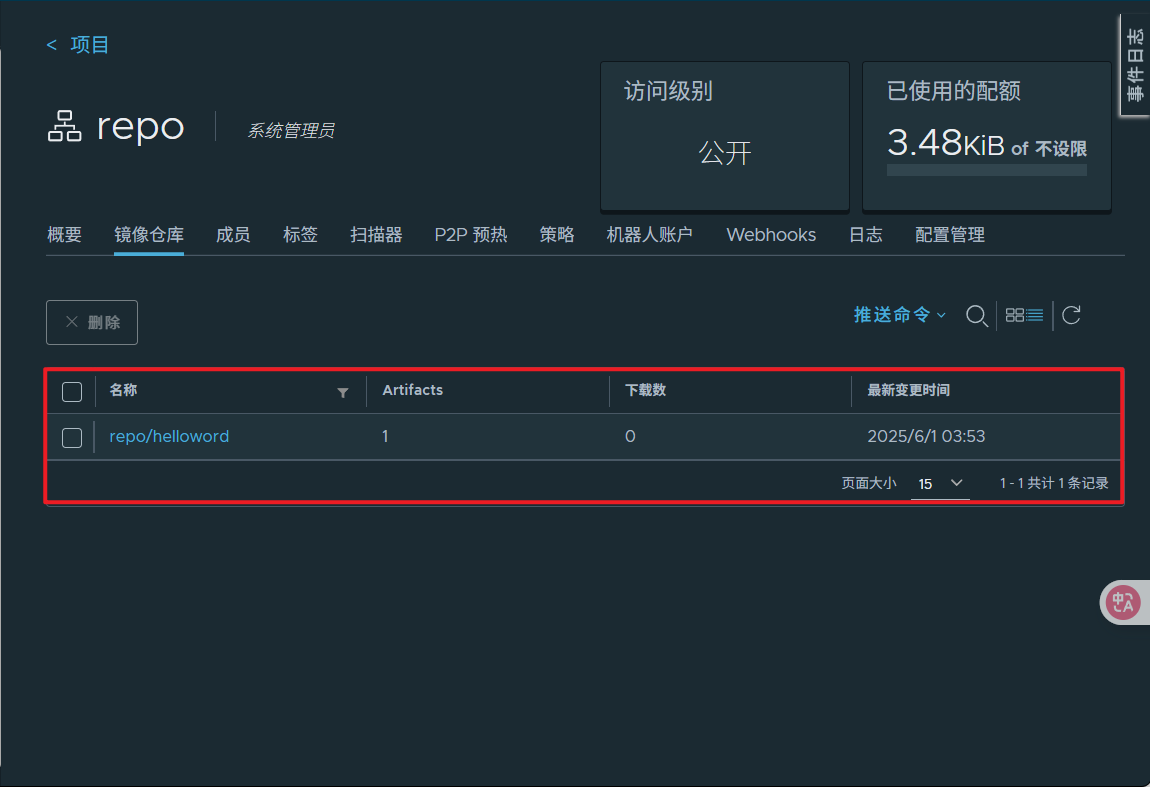
 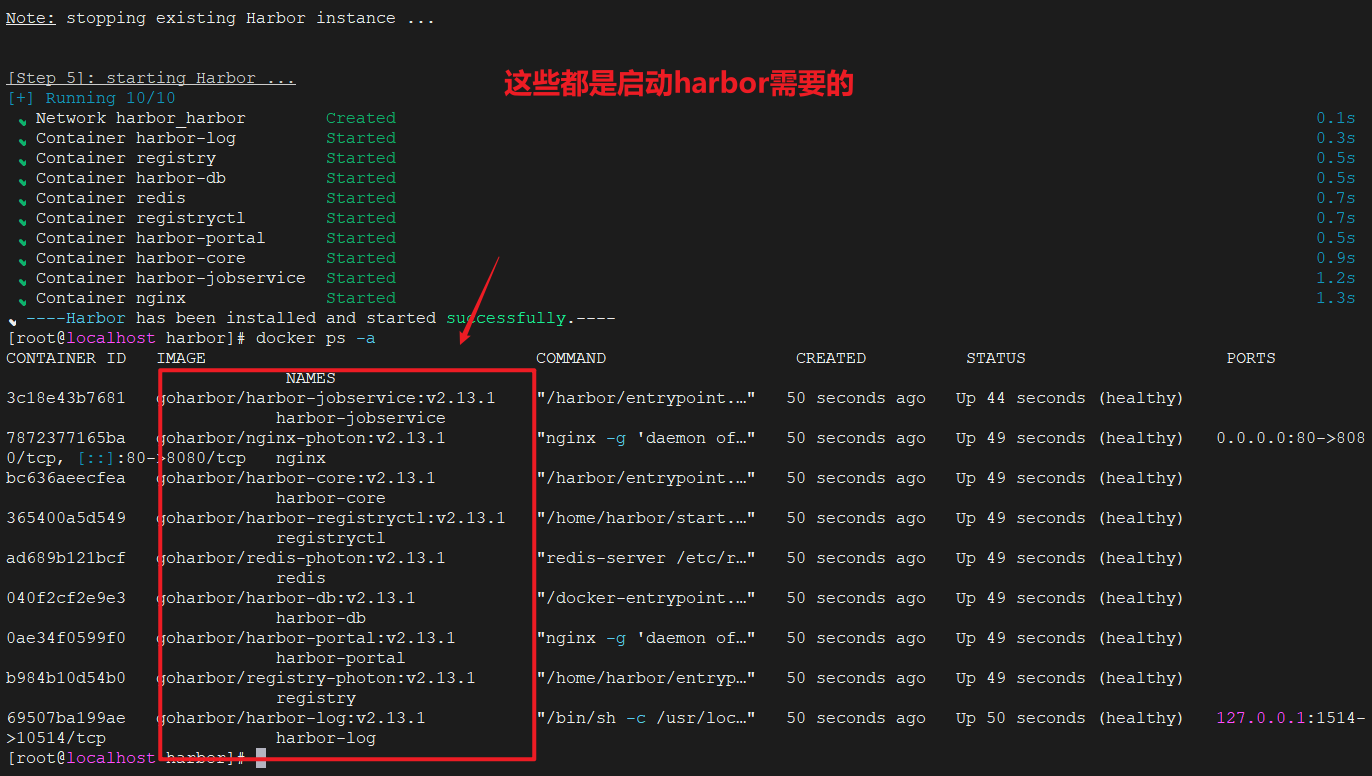 进入浏览器,输入ip+端口,登录成功后的界面如图所示:
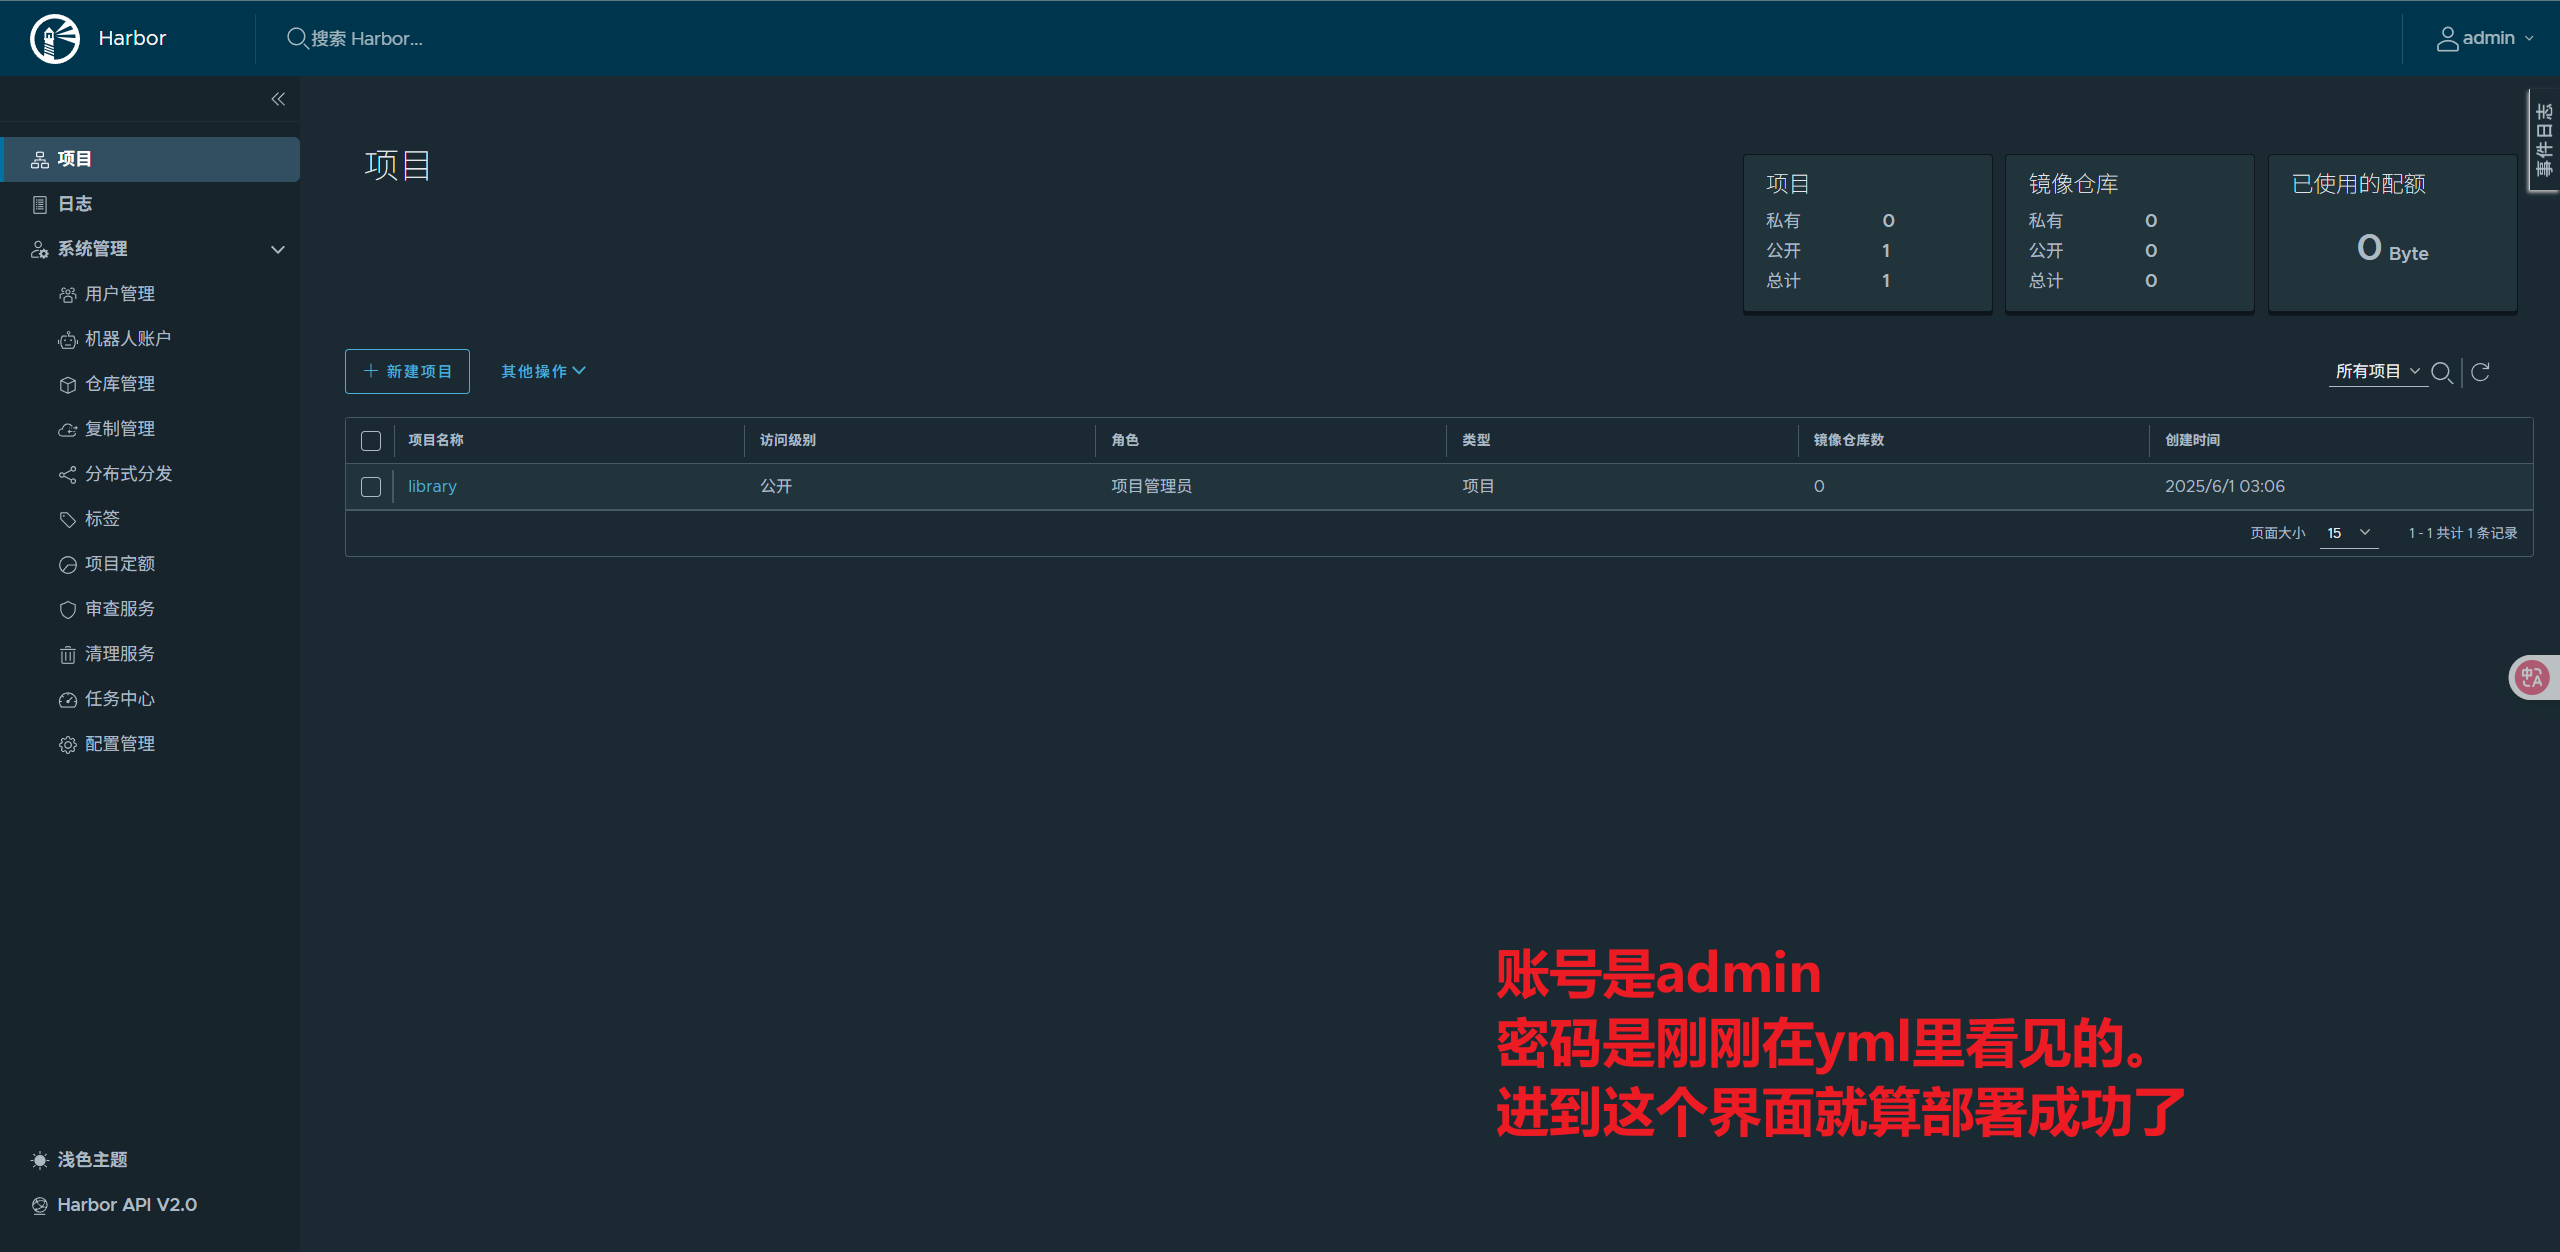
3. 基本操作
总所周知,这是一个搭建私人仓库的东西,所以我们可以往上边放镜像和拉镜像。那我们最后要怎么做呢?请听我娓娓道来(啥啊)
1. 放镜像
首先我们去浏览器创建项目 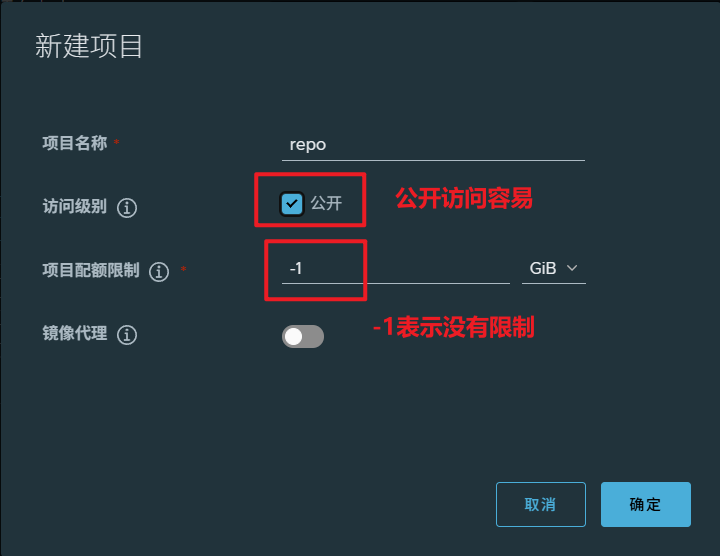 然后要给镜像打上标签格式,格式为:harbor地址/项目名/镜像名:版本
[root@localhost harbor]# docker images
swr.cn-north-4.myhuaweicloud.com/ddn-k8s/docker.io/library/hello-world latest d2c94e258dcb 2 years ago 13.3kB
#在网上拉了一个镜像作为实验
[root@localhost harbor]# docker tag d2c94e258dcb 10.10.10.12:80/repo/helloword:v1.0.0
10.10.10.12:80/repo/helloword v1.0.0 d2c94e258dcb 2 years ago 13.3kB
之后我们要去编辑daemon.json文件,这是指定了仓库的地址: [root@localhost harbor]# vim /etc/docker/daemon.json
{
"insecure-registries": [
"192.168.11.102:80"
]
}
//之后我们重启一下docker,并进行登录。无法重启多半为这个文件写错了
[root@localhost harbor]# docker login -u admin -p Harbor12345 10.10.10.12:80
WARNING! Using --password via the CLI is insecure. Use --password-stdin.
WARNING! Your credentials are stored unencrypted in '/root/.docker/config.json'.
Configure a credential helper to remove this warning. See
https://docs.docker.com/go/credential-store/
Login Succeeded
这里失败多半因为上边的dean没配置对
上传到仓库时很简单的命令,使用docker push+格式就可以了。
[root@localhost harbor]# docker push 10.10.10.12:80/repo/helloword:v1.0.0
The push refers to repository [10.10.10.12:80/repo/helloword]
ac28800ec8bb: Pushed
v1.0.0: digest: sha256:d37ada95d47ad12224c205a938129df7a3e52345828b4fa27b03a98825d1e2e7 size: 524
[root@localhost harbor]#
由于我每次自启动都会需要重新启动harbor和登录,所以我写了个脚本如下:
[root@localhost ~]# cat harbor_start.sh
docker start 3c18e43b7681 7872377165ba bc636aeecfea 365400a5d549 ad689b121bcf 040f2cf2e9e3 0ae34f0599f0 b984b10d54b0
docker login -u admin -p Harbor12345 10.10.10.12:80
[root@localhost ~]# sh harbor_start.sh
3c18e43b7681
7872377165ba
bc636aeecfea
365400a5d549
ad689b121bcf
040f2cf2e9e3
0ae34f0599f0
b984b10d54b0
WARNING! Using --password via the CLI is insecure. Use --password-stdin.
这样就能自动执行了
2. 拉镜像
这台机是单独拿出来配置harbor的,所以我拿另一台机下拉镜像。
在客户端机器配置如上文所示的daemon.json文件还有log同一个账号,就可以进行下拉了。
[root@localhost ~]# vim /etc/docker/daemon.json
[root@localhost ~]# systemctl daemon-reload
[root@localhost ~]# systemctl restart docker
[root@localhost ~]# docker login -u admin -p Harbor12345 10.10.10.12:80
WARNING! Using --password via the CLI is insecure. Use --password-stdin.
WARNING! Your credentials are stored unencrypted in '/root/.docker/config.json'.
Configure a credential helper to remove this warning. See
https://docs.docker.com/go/credential-store/
Login Succeeded
[root@localhost ~]# docker pull 10.10.10.12:80/repo/helloword:v1.0.0
v1.0.0: Pulling from repo/helloword
c1ec31eb5944: Pull complete
Digest: sha256:d37ada95d47ad12224c205a938129df7a3e52345828b4fa27b03a98825d1e2e7
Status: Downloaded newer image for 10.10.10.12:80/repo/helloword:v1.0.0
10.10.10.12:80/repo/helloword:v1.0.0
[root@localhost ~]# docker images
REPOSITORY TAG IMAGE ID CREATED SIZE
jenkins/jenkins latest 9e9b81c34de2 4 days ago 471MB
postgres latest 7fb32a7ac3a9 9 days ago 438MB
hello-world latest 74cc54e27dc4 4 months ago 10.1kB
gitlab/gitlab-ce 16.11.4-ce.0 60d57c5f8865 11 months ago 2.88GB
10.10.10.12:80/repo/helloword v1.0.0 d2c94e258dcb 2 years ago 13.3kB
这样就证明成功了
4. 在jenkins内部使用docker
1. 实现原理
让docker的核心文件docker.sock归属于root组且能被其他用户读写,然后拥有docker可执行文件,配置daemon.json文件即可。
2. 实操
更改docker.sock的组和权限
[root@localhost ~]# cd /var/run
[root@localhost run]# chown root:root docker.sock
[root@localhost run]# ll | grep docker.sock
srw-rw---- 1 root root 0 6月 1日 03:57 docker.sock
[root@localhost run]# chmod o+rw docker.sock
[root@localhost run]# ll | grep docker.sock
srw-rw-rw- 1 root root 0 6月 1日 03:57 docker.sock
更改jenkins的yml配置:
1 version: '3'
2
3 services:
4 jenkins:
5 image: jenkins/jenkins:latest
6 container_name: jenkins
7 user: "1000:1000"
8 ports:
9 - "8080:8080"
10 - "50000:50000"
11 volumes:
12 - ./data/:/var/jenkins_home/
13 - /var/run/docker.sock:/var/run/docker.sock
14 - /usr/bin/docker:/usr/bin/docker
15 - /etc/docker/daemon.json:/etc/docker/daemon.json
/var/run/docker.sock:/var/run/docker.sock是把docker核心文件隐射到容器 /usr/bin/docker:/usr/bin/docker是把命令行怼进去 /etc/docker/daemon.json:/etc/docker/daemon.json是把仓库配置搞进去
把这些弄好后进入容器内部,看是否能使用docker命令,能就算成功
jenkins@d25b11fa76f7:/$ docker version
Client: Docker Engine - Community
Version: 28.1.1
API version: 1.49
Go version: go1.23.8
Git commit: 4eba377
Built: Fri Apr 18 09:53:25 2025
OS/Arch: linux/amd64
Context: default
Server: Docker Engine - Community
Engine:
Version: 28.1.1
API version: 1.49 (minimum version 1.24)
Go version: go1.23.8
Git commit: 01f442b
Built: Fri Apr 18 09:51:44 2025
OS/Arch: linux/amd64
Experimental: false
containerd:
Version: 1.7.27
GitCommit: 05044ec0a9a75232cad458027ca83437aae3f4da
runc:
Version: 1.2.5
GitCommit: v1.2.5-0-g59923ef
docker-init:
Version: 0.19.0
GitCommit: de40ad0
完成啦(*´∀`)
5. 在客户端上部署脚本拉取harbor
我们来部署脚本:
[root@localhost ~]# cat deploy.sh
horbar_addr=$1 #把第一个变量的值赋给他,下边以此类推
horbar_repo=$2
project=$3
version=$4
port=$5
imageName=$horbar_addr/$horbar_repo/$project:$version#拉取的镜像名
echo $imageName#输出反馈
containerId=`docker ps -a | grep ${project} | awk '{print $1}'`#获取容器的id
echo $containerId
if [ "$containerId" != "" ]; then #如果存在相同的容器就停止并删掉
docker stop $containerId
docker rm $containerId
fi
tag=`docker images | grep ${project} | awk '{print $2}'`#标注tag的格式
echo $tag #输出自由组装战士tag
if [ "$tag" != "$version" ]; then #版本相同就删掉当前镜像
docker rmi $imageName
fi
docker login -u admin -p Harbor12345 $horbar_addr
docker pull $imageName
docker run -d -p $port:$port --name $project $imageName #进行端口映射
echo "success"
部署成功之后,我们可以看到:
[root@localhost ~]# sh deploy.sh 10.10.10.12:80 repo helloword v2.0.0 8081
10.10.10.12:80/repo/helloword:v2.0.0
v1.0.0 v2.0.0
Untagged: 10.10.10.12:80/repo/helloword:v2.0.0
WARNING! Using --password via the CLI is insecure. Use --password-stdin.
Login Succeeded
v2.0.0: Pulling from repo/helloword
Digest: sha256:d37ada95d47ad12224c205a938129df7a3e52345828b4fa27b03a98825d1e2e7
Status: Downloaded newer image for 10.10.10.12:80/repo/helloword:v2.0.0
10.10.10.12:80/repo/helloword:v2.0.0
547f491feede9d87348cc72d5b0ed3f1cac2db507d40a9696b196348e07ed989
success